How We Implemented ChatGPT in Tech Support in 7 Minutes Without Code
The idea of using ChatGPT to assist our website support technicians hung in the air for a long time. However, we did not want to allocate much developer time to connecting to APIs. So, by accident, the idea struck us while setting up browser extensions for automation, and it took merely 7 minutes to get everything up and running.
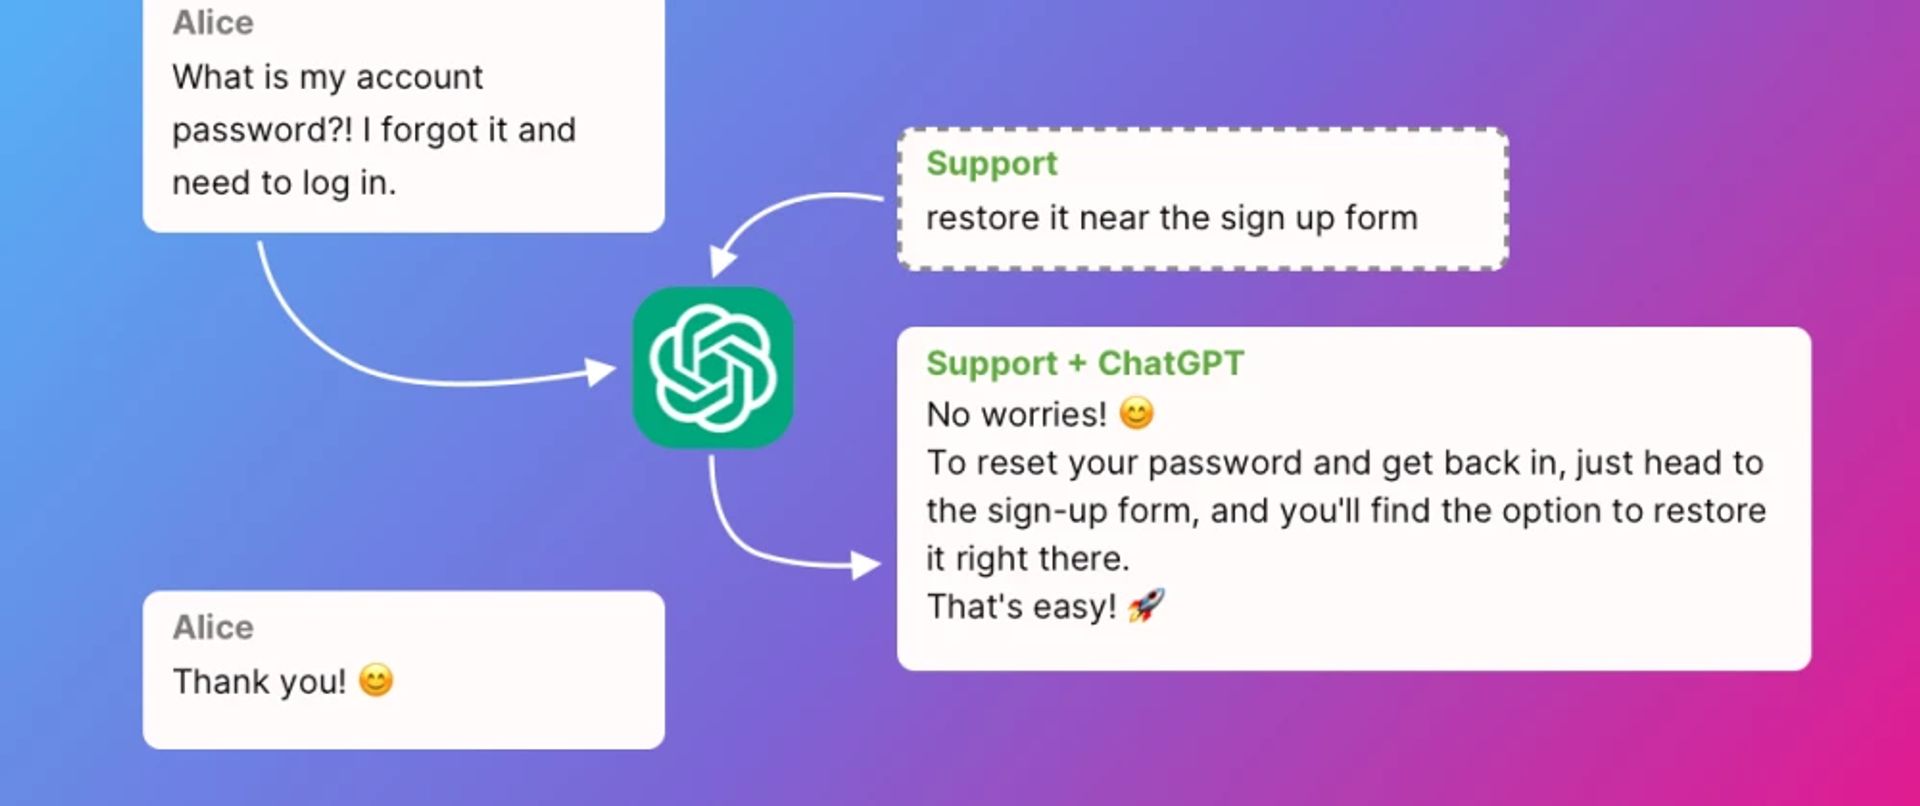
We decided to make a simple automation to answer user questions that do not require complex problem-solving. So, we came up with the following approach:
- We receive a support ticket from a customer.
- Our staff member writes a short response in the provided text box.
- The automation is started, receiving a prompt that contains the question text and a brief response from our team member.
- ChatGPT generates a response within a text box based on the given prompt.
- Our support team members can revise the response and submit it.
How we automated the process
[1]. We started by installing the GoLess Automation extension.
[2]. Then, we signed up on the website to create our automation flows.
[3]. Once registered, we navigated to the dashboard and clicked "New Workflow".

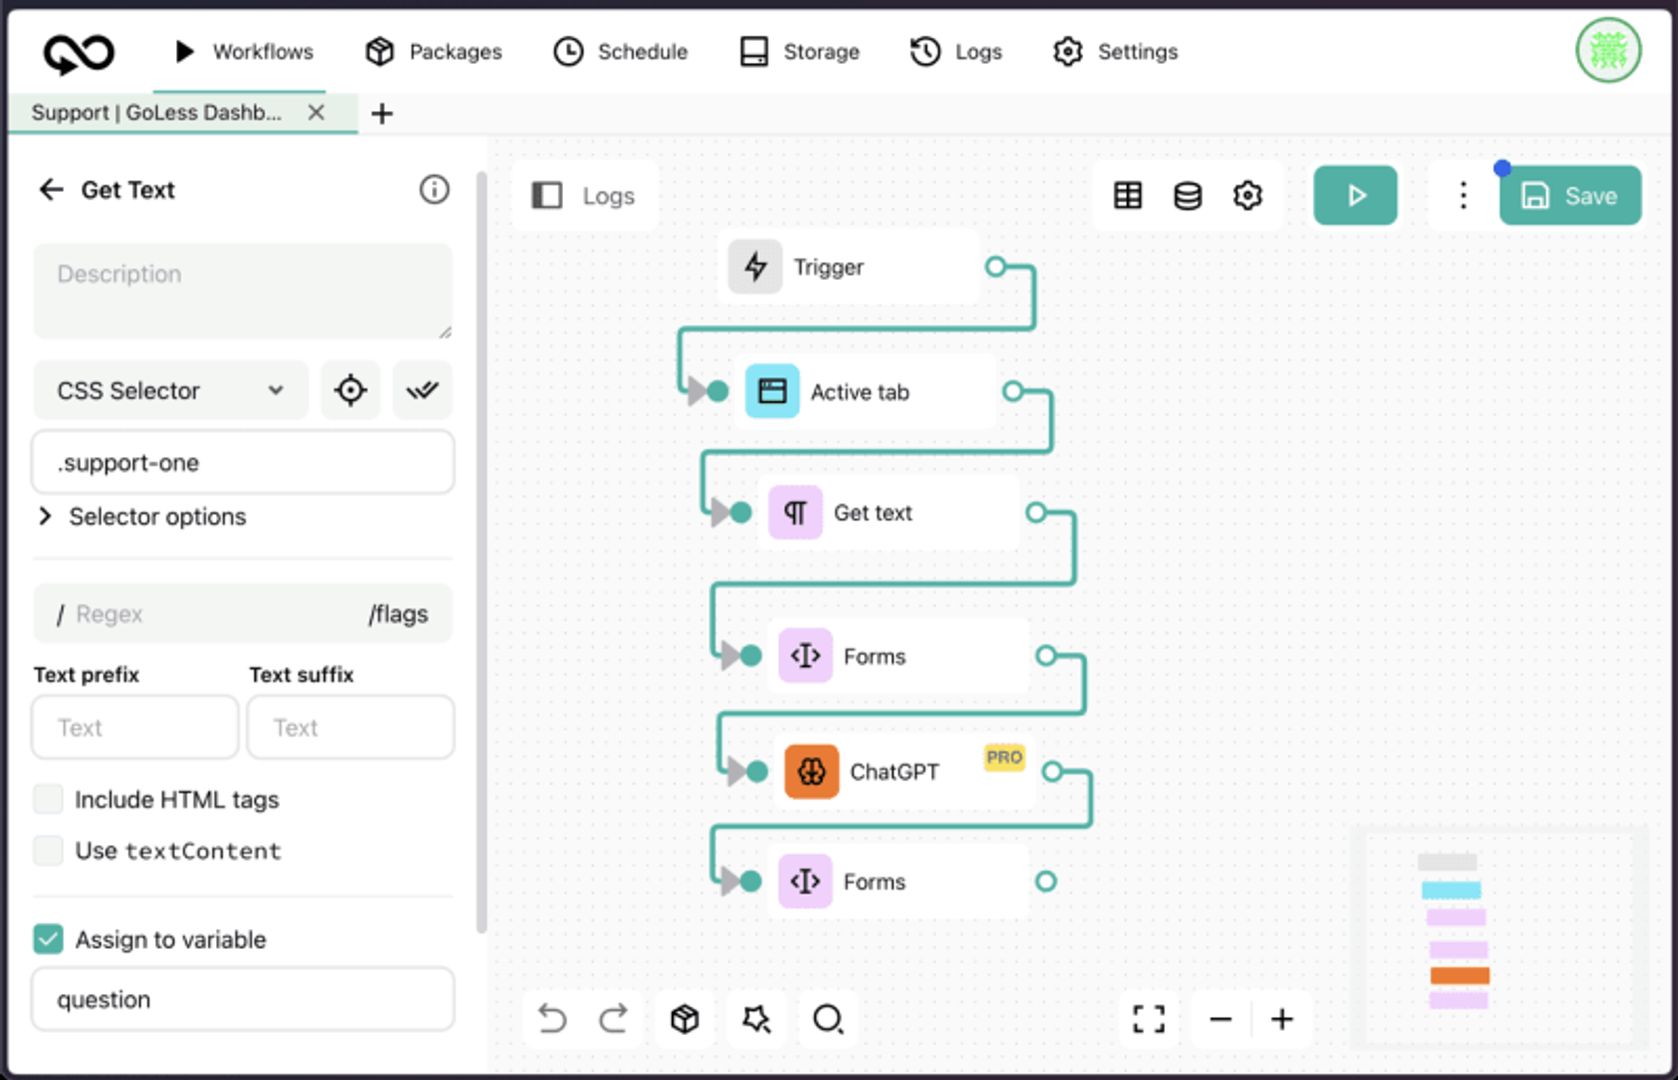
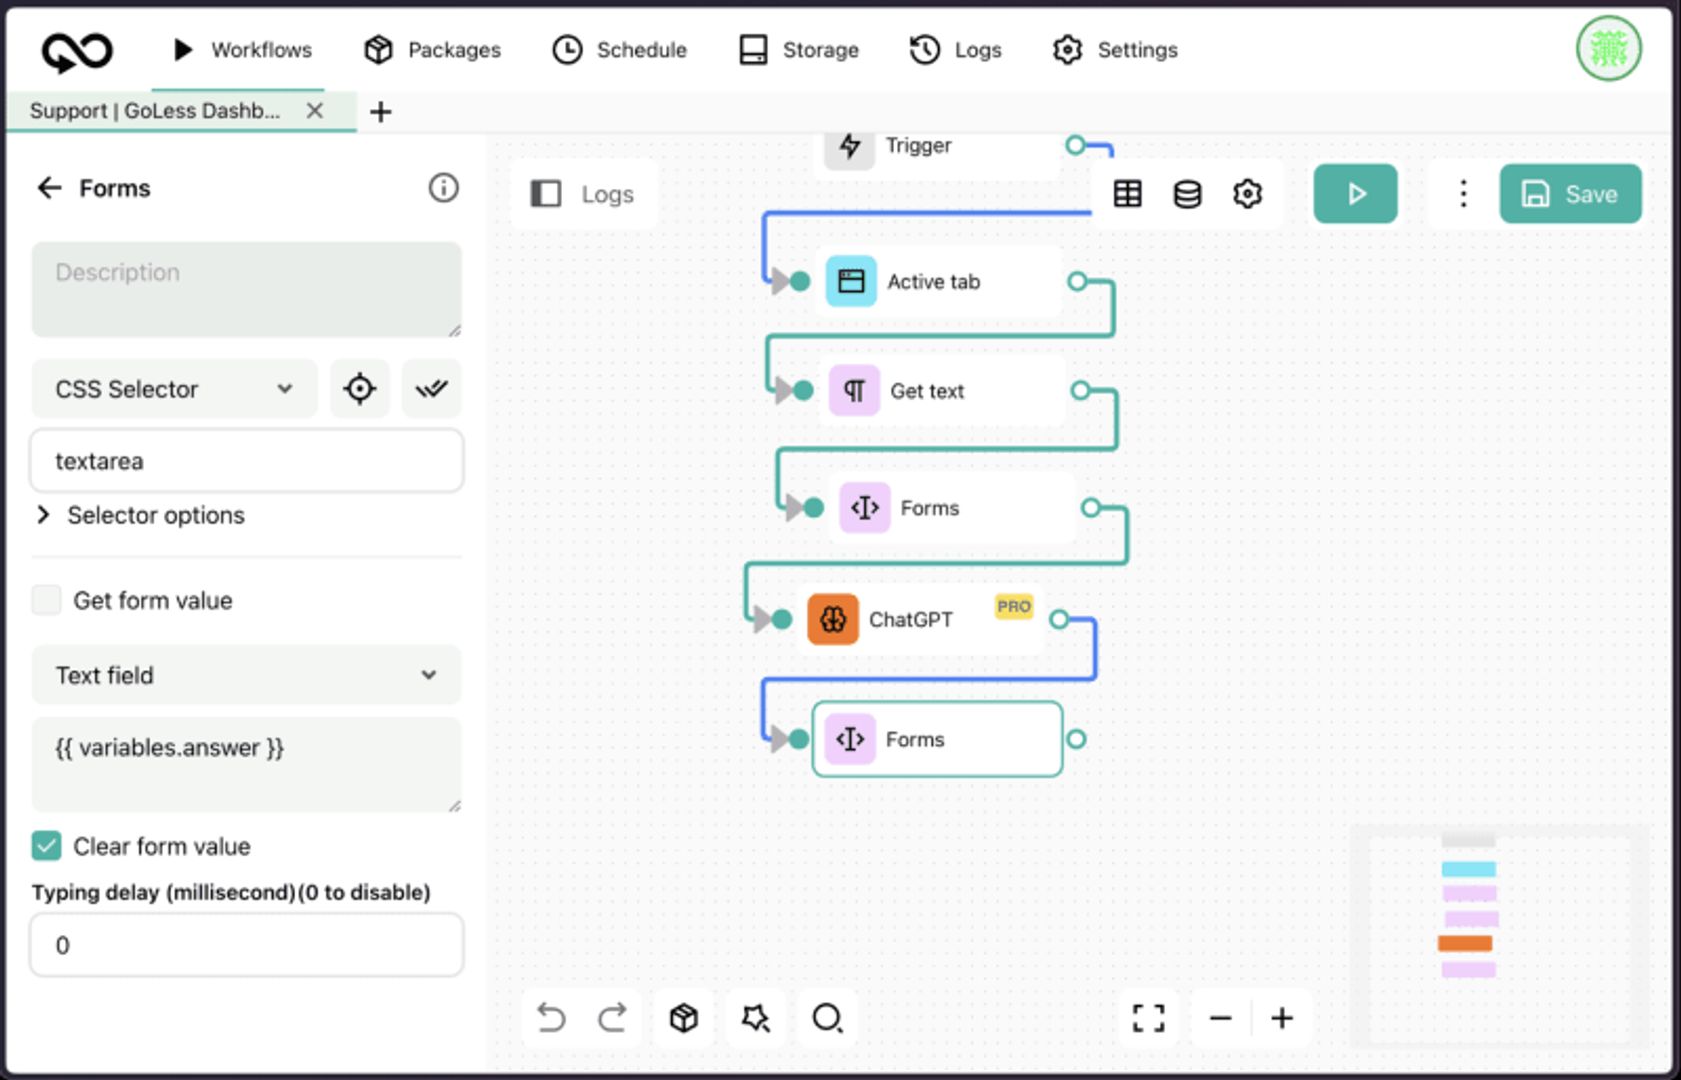
[4]. Next, we added the following key blocks from the list on the left side:
- Trigger. This serves as a simple initialization.
- Active Tab. This element is necessary to start using the current tab during the automation execution.
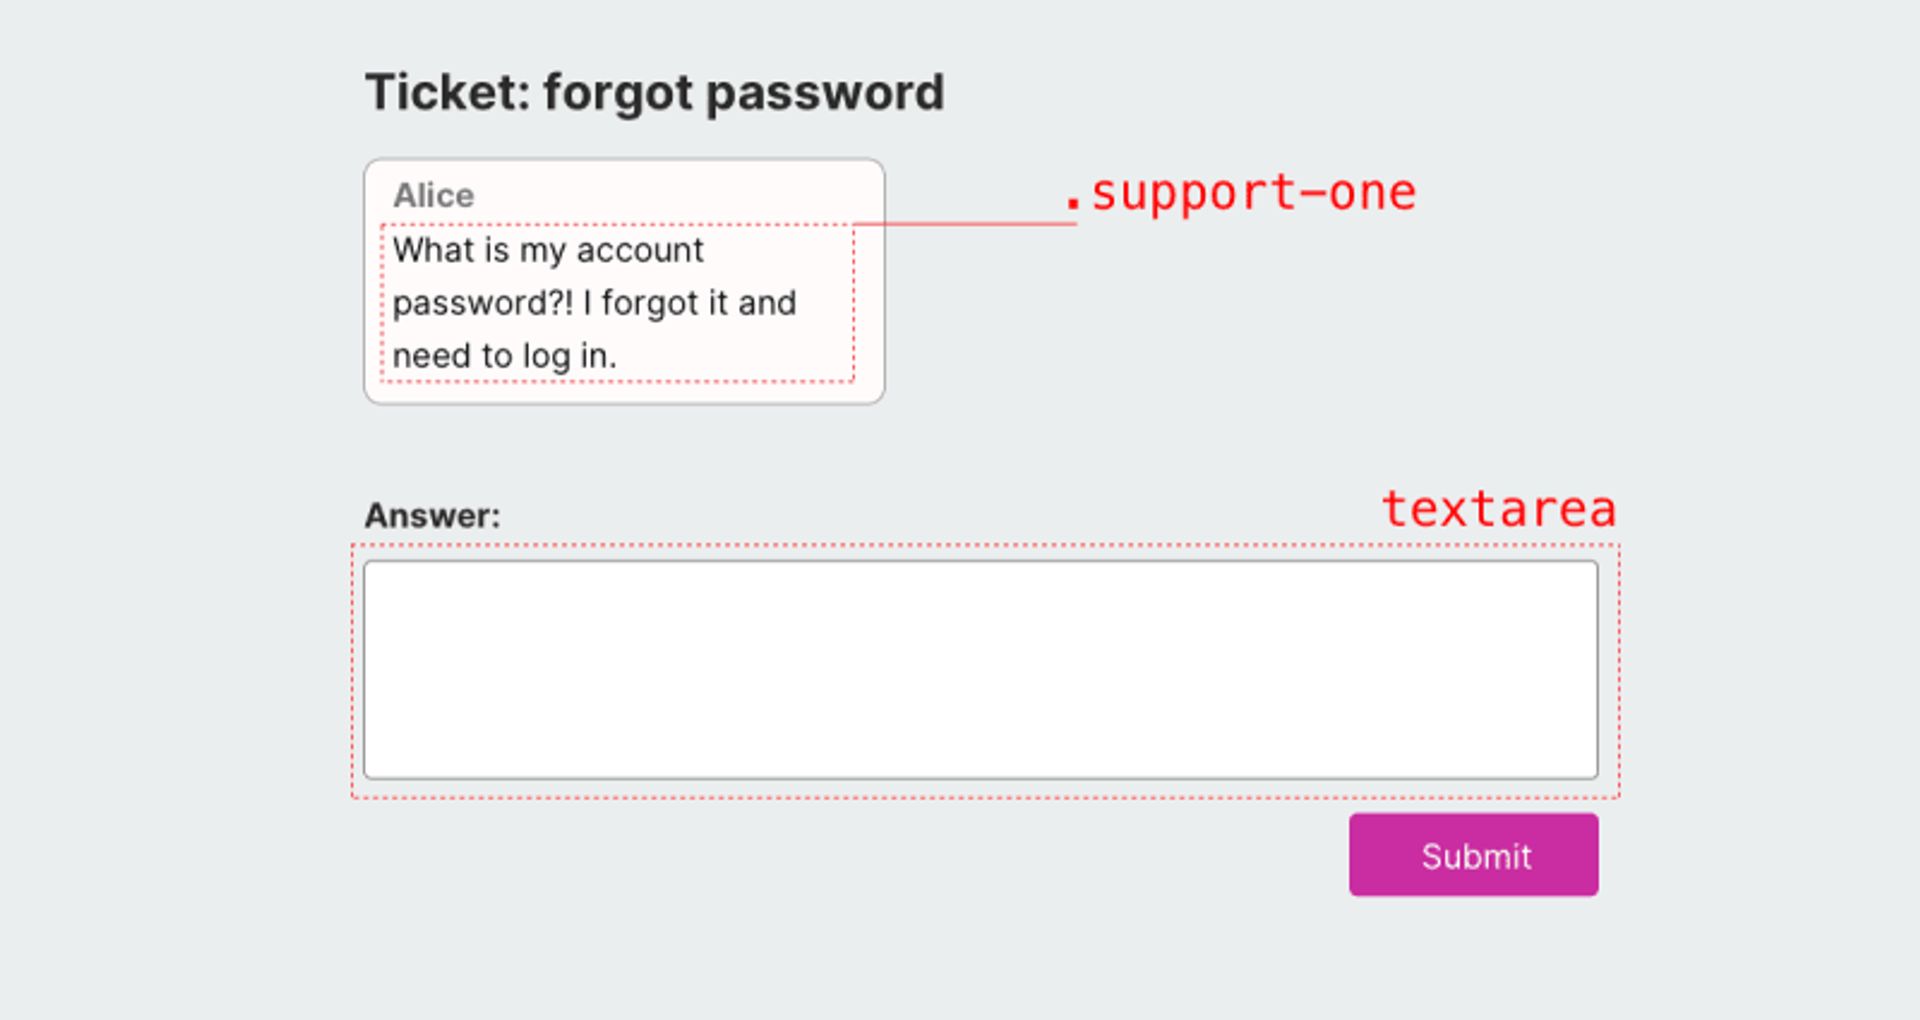
- Get Text. Here, we select the first message from the customer. We needed to specify a unique CSS class, which in our case was ".support-one". Also, we checked the box "Assign to variable" to ensure that the text we obtained from the selector is assigned to the variable "question".
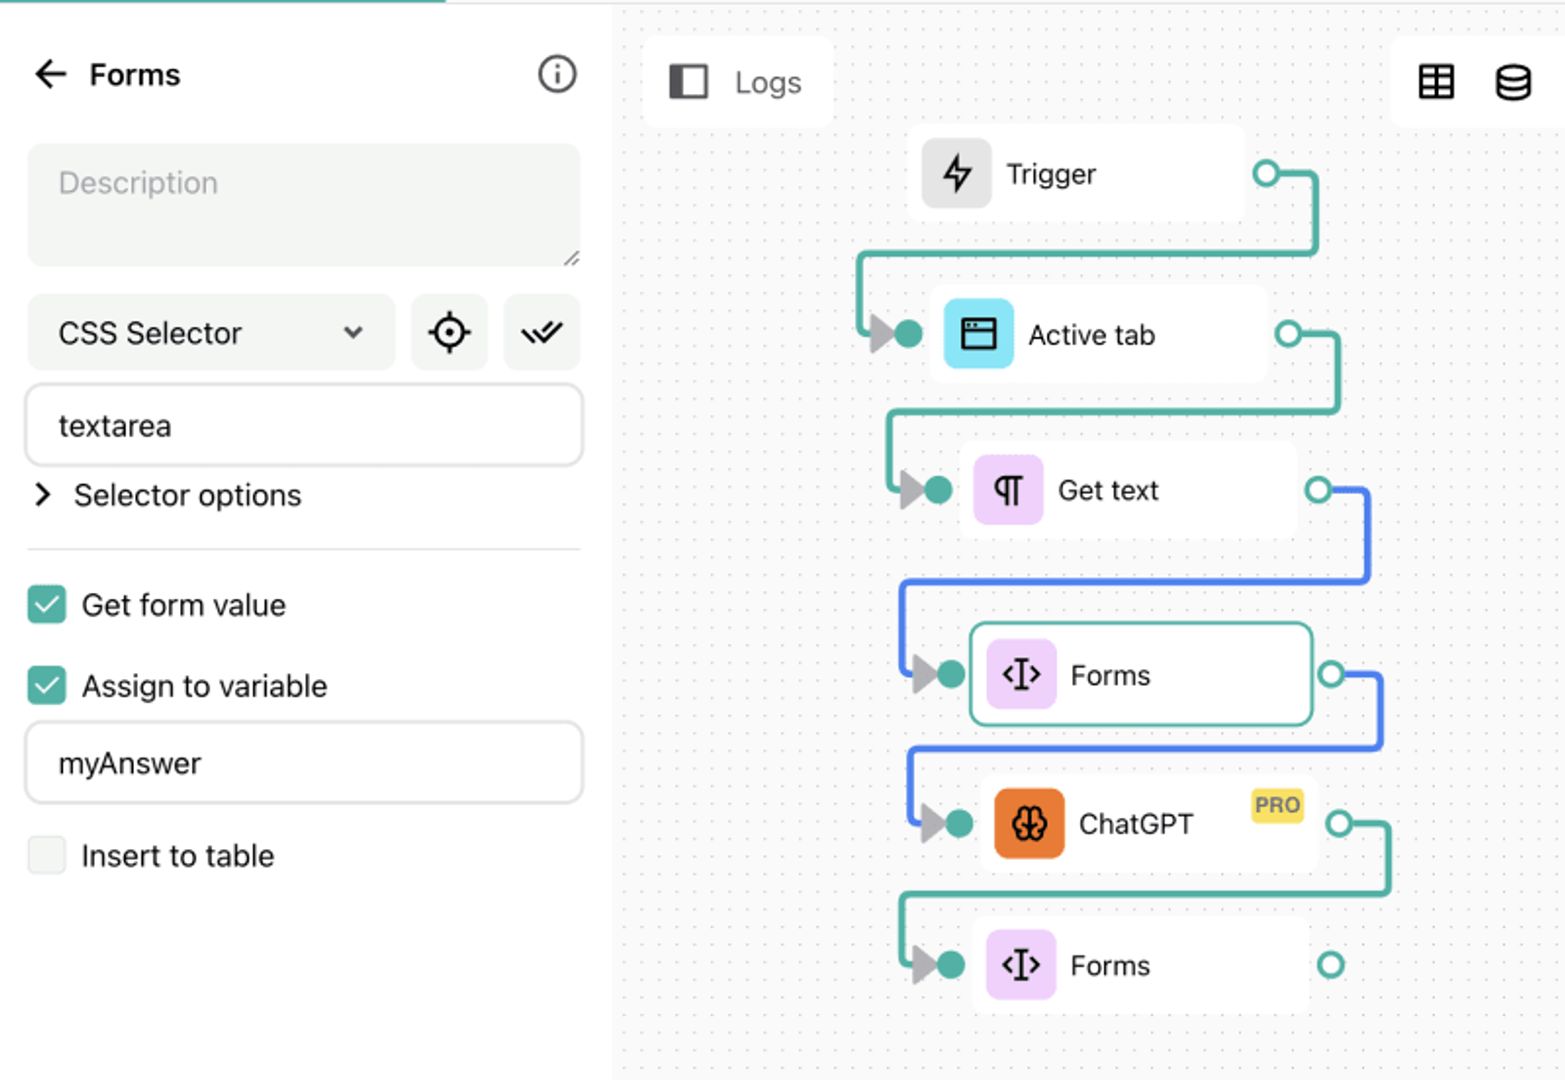
[5]. Forms. When setting up our form, we specify the "Textarea" field selector, where the support team member inputs their reply. From this field, we get the short reply of our support and assign it to the variable "myAnswer".
[6]. ChatGPT block. Here, we selected GPT-4 and opted for the "Use My Prompt" option. Next, we composed our prompt using the variables we set earlier:
Customer has asked the following question: "{{ variables.question }}". Write a brief reply based on this: "{{ variables.myAnswer }}"
Make sure your reply is clear, short and friendly.
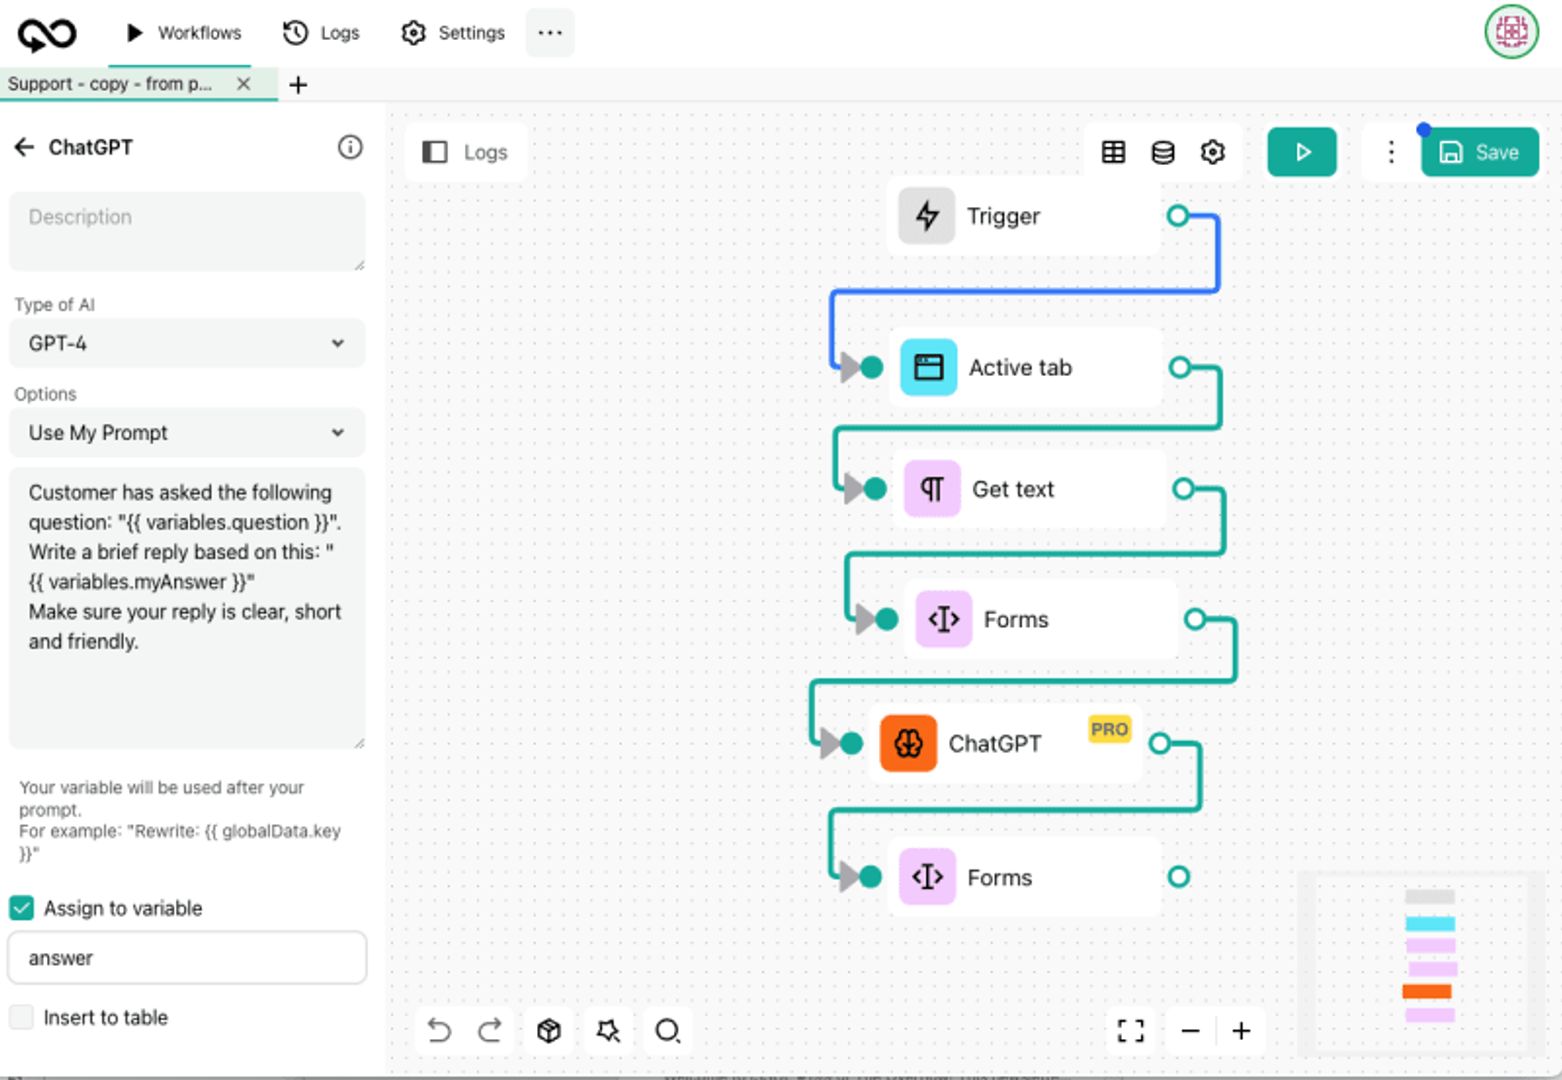
The response from ChatGPT was assigned to the variable "answer".
[7]. Finally, we used the Form block to input the reply from ChatGPT into our response form.
This is a rough representation of our webpage and classes:
Outcome
Now, let's see how this works.
- Open the extension. It is important to open it first. Otherwise, it won't work.
- Go to the webpage from which the dialogue with the customer arises.
- Write a brief reply in the answer form, or you can proceed without it if you prefer.
- Start our automation. Here, it is named "Support answer":

- Wait a bit and get a reply from ChatGPT right in your support interface:

That's it.
The workflow we built is functional, and you are welcome to edit it according to your needs. You can access it here.
Now, we are experimenting with more workflows to help improve the language written by not native speakers in our support so it sounds natural and friendly.
Feel free to share your thoughts on improving the workflow or automating other things in tech support with ChatGPT.
 GoLess Team